Stars & Sprinkles Chocolates
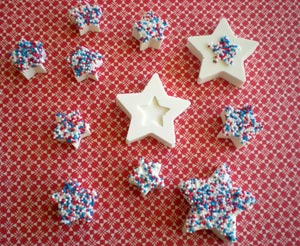
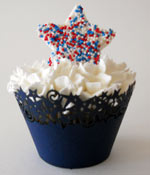
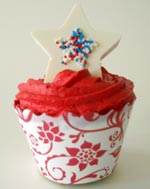
If you’re feeling patriotic and have dreams of backyard BBQs and 4th of July cookouts these chocolate stars are perfect for adding some color to your festivities. Use them as cupcake toppers for spectacular 4th of July cupcakes, or use them as a border at the bottom of a cake. The possibilities are endless and because this is a quick and easy project, kids will be happy to join in the fun as well.
This is a great chocolate project for those who are just beginning to work with chocolate. There is just one color of chocolate that you will need and the Ice Princess Chocolate Mold is very easy to work with.
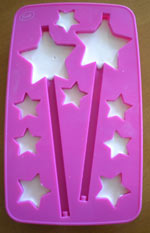
To make these stars, you will need the following tools –
~One 12 oz squeeze bottle
You will also need the following Items –
~1 bag (16 oz) white chocolate candy melts
Step 1 – Begin by melting the chocolate. I melt my chocolate in the microwave by emptying an entire bag of white chocolate melts into a large Pyrex bowl and microwaving it in intervals of 30 seconds on the defrost setting, stirring in between each 30 second interval. The stirring will ensure that the heat gets distributed throughout the chocolate and it melts evenly.
Step 2 – Once the chocolate is fully melted and smooth (no lumps), use a funnel to transfer the chocolate into a 12 ounce squeeze bottle.
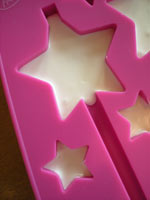
Step 3 – Now you are ready to fill the mold! This mold is made of silicone and though they are originally designed for making ice cubes, I found that these silicone molds work great for chocolate. They produce crisp designs and the silicone is very flexible making it easier to remove the chocolate. This mold is pretty deep so I only fill each star about 3/4 full.
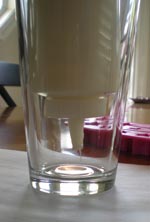
Hint – Keep your chocolate squeeze bottle upside down in a pint glass when you are not holding it. This will keep all of the chocolate close to the tip and will eliminate air bubbles and the chocolate explosions that you sometimes get from hidden air pockets.
Step 4 – Once all of the star shapes are filled with chocolate, tap the mold several times to allow air bubbles to float to the top. Next place the mold in the refrigerator on a flat surface for about 15 minutes.
Step 5 – Remove the mold and pop out the stars. Gently pry away the silicone from around each of the stars before trying to release them. This will help detach them from the mold.
Step 6 – Repeat the process to make more stars, or if you have enough, move on to decorating your stars.
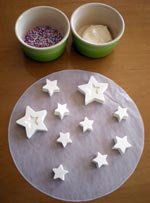
Step 7 – Prepare your decorating supplies. For my stars, I’m staying with the patriotic theme by using tri-color nonpareils which are in red, white, and blue. You can use any combination of sprinkles you like. Nonpareils work well because they are small and provide good coverage. Now you will need two small dishes or plates. Place your sprinkles in one dish and squeeze a bit of chocolate (maybe two tablespoons) into the other dish.
Hint – If you are done with your chocolate, pipe the remainder that is left in the squeeze bottle into small dollups on a piece of parchment paper. Don’t forget this step, because if your chocolate solidifies in your squeeze bottle, it will be almost impossible to remove (you would need to rewarm it). Once the wafers that you pipe are dry, all you need to do it put them in an airtight bag or container and they will be ready for re-melting for your next project.
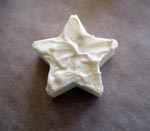
Step 8 – Begin decorating! Pick up one of your chocolate stars and use your small paintbrush to paint the chocolate onto the surface of your star. Do this quickly so that the chocolate doesn’t set up as you work. You can rewarm the chocolate in the microwave if it gets to cool. Once the surface of your star is coated in chocolate, immediately dip it into the sprinkles. Press it down firmly and remove it. It should be covered in colorful sprinkles! Repeat this with the remaining stars be creative with your decorating. I chose to fill in just the center of some of the bigger stars. You can create any pattern by brushing the chocolate on isolated areas of the stars.
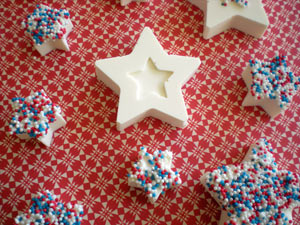
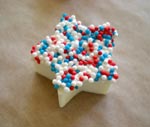
Have fun with these stars by throwing them in a fruit salad, using them as cupcake toppers, decorating a cake with them, making a candy necklace, or anything else you can think of. Use your imagination and if you enjoy this blog and decide to try it yourself, please send in your pictures. We would love to post them and share all of your wonderful projects!
