Valentine’s Cookies
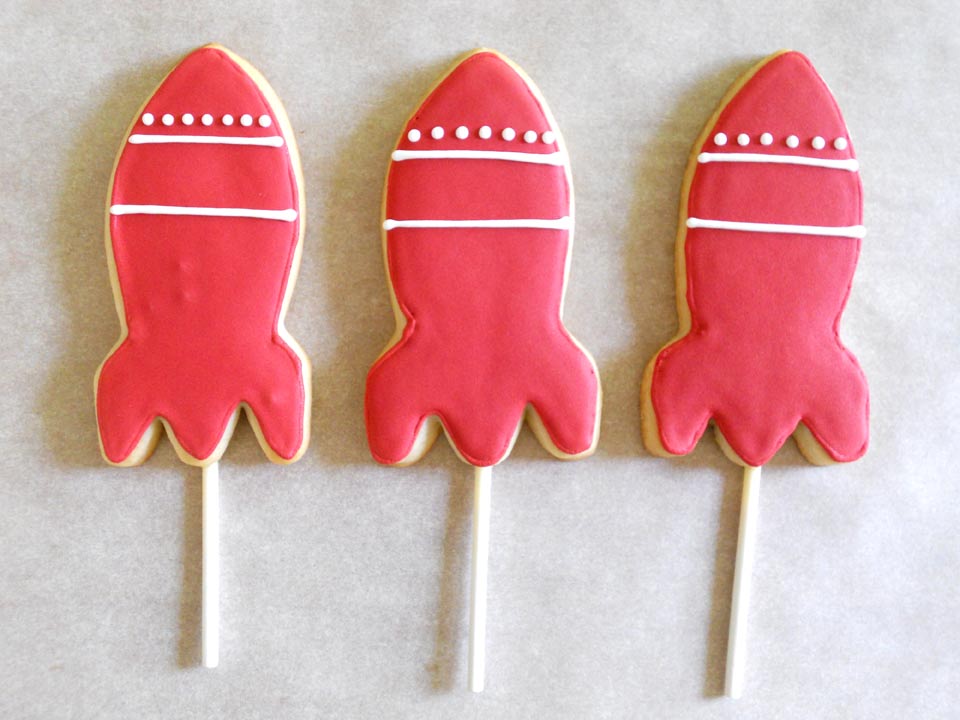
Valentine’s Day is almost here, and while it is getting closer by the minute, it’s not too late to make some lovely cookies for your sweetheart! These cookies are pretty perfect for a Valentine’s party or fun project. You can make them as simple or detailed as you like, and who can resist a delicious decorated sugar cookie?

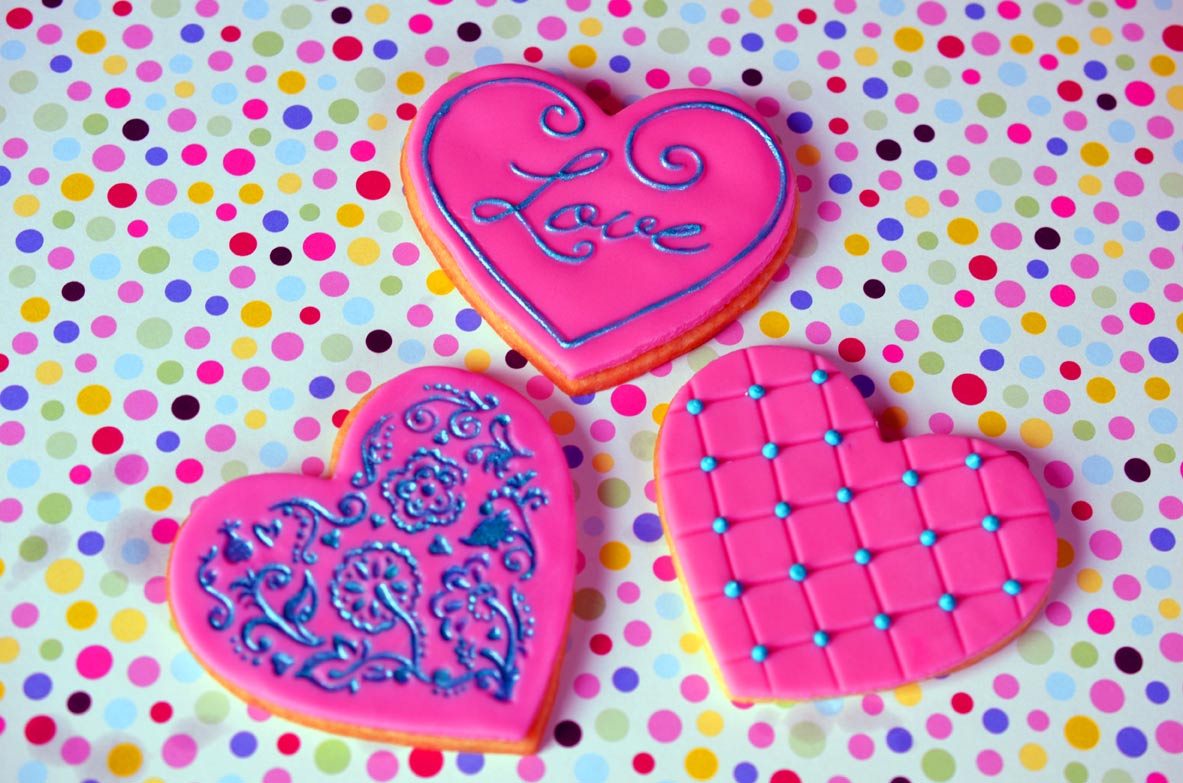
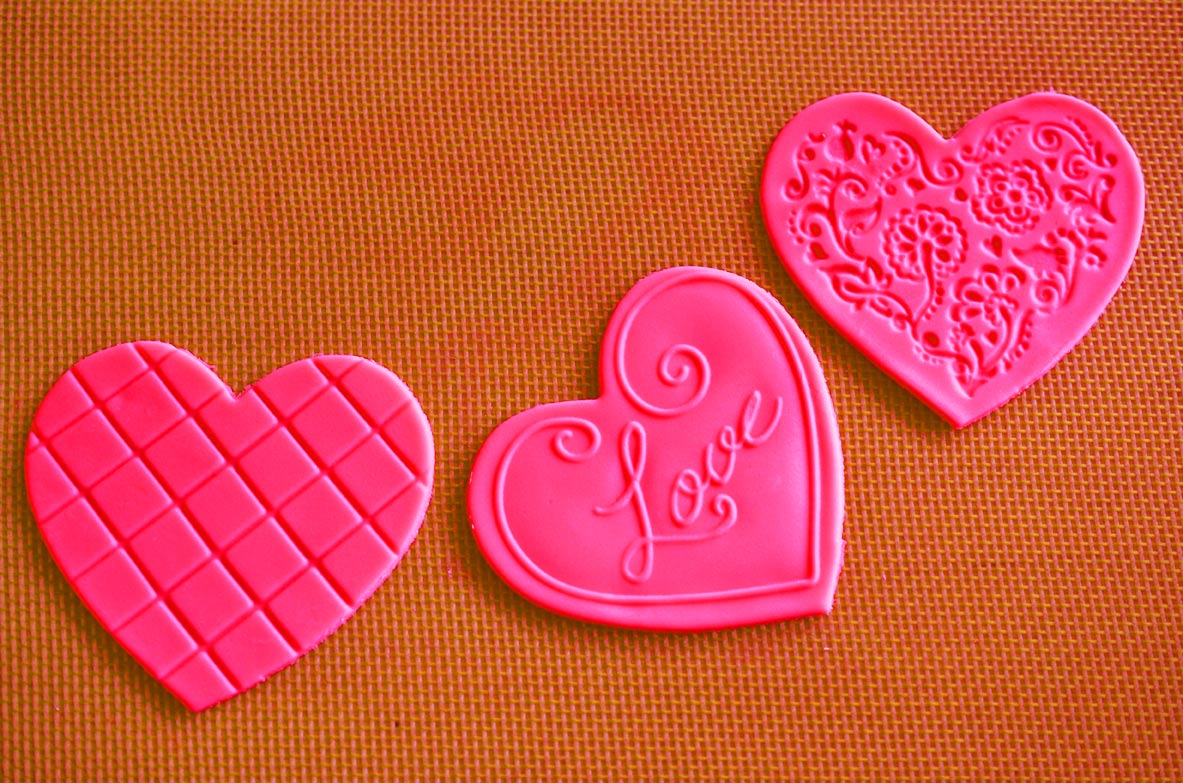
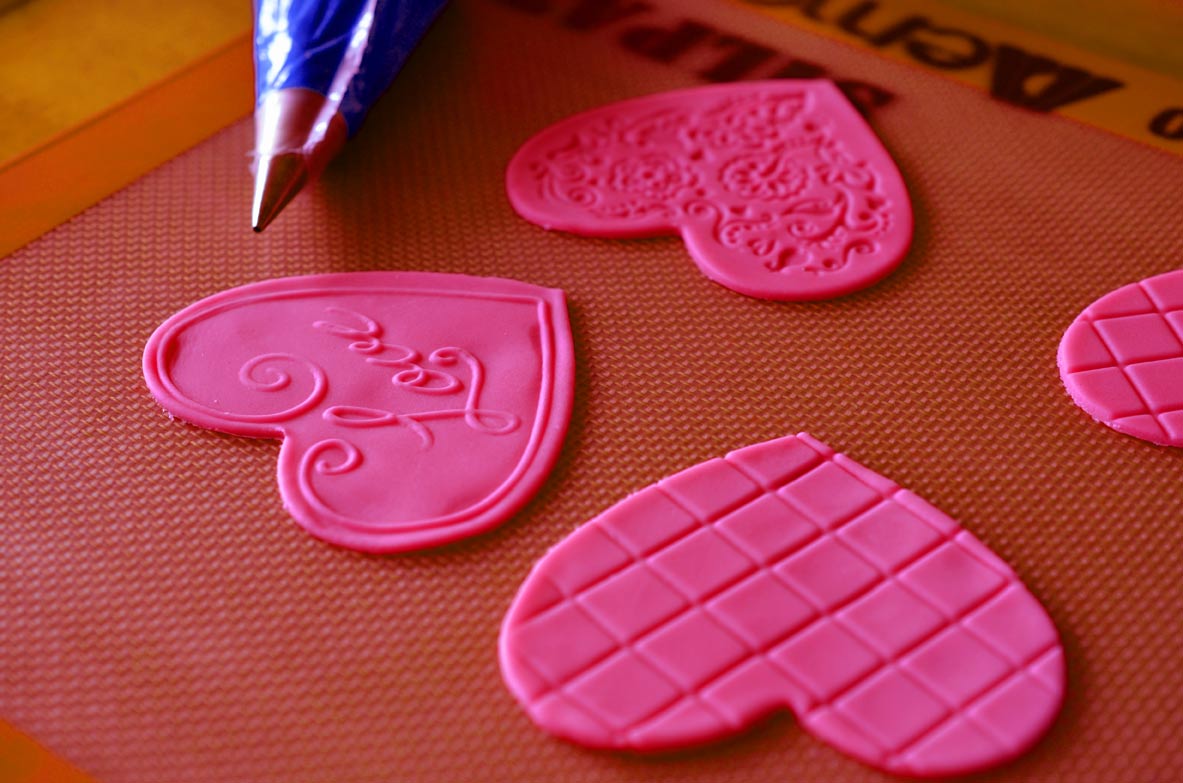
I made these cookies with a clever cookie set that lets you use texture mats to imprint the details into fondant. The cookies look intricate and detailed, yet the process is very straightforward. If you have shaky hands and shy away from piping, this set is perfect. With the texture mats, you can get the look of a beautifully piped cookie, without the work. The cookies are beautiful plain or embellished, and mistakes can always be eaten! See below for a step by step on making these cookies.
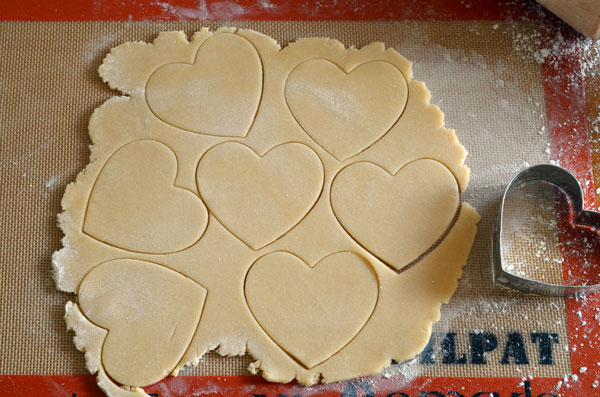
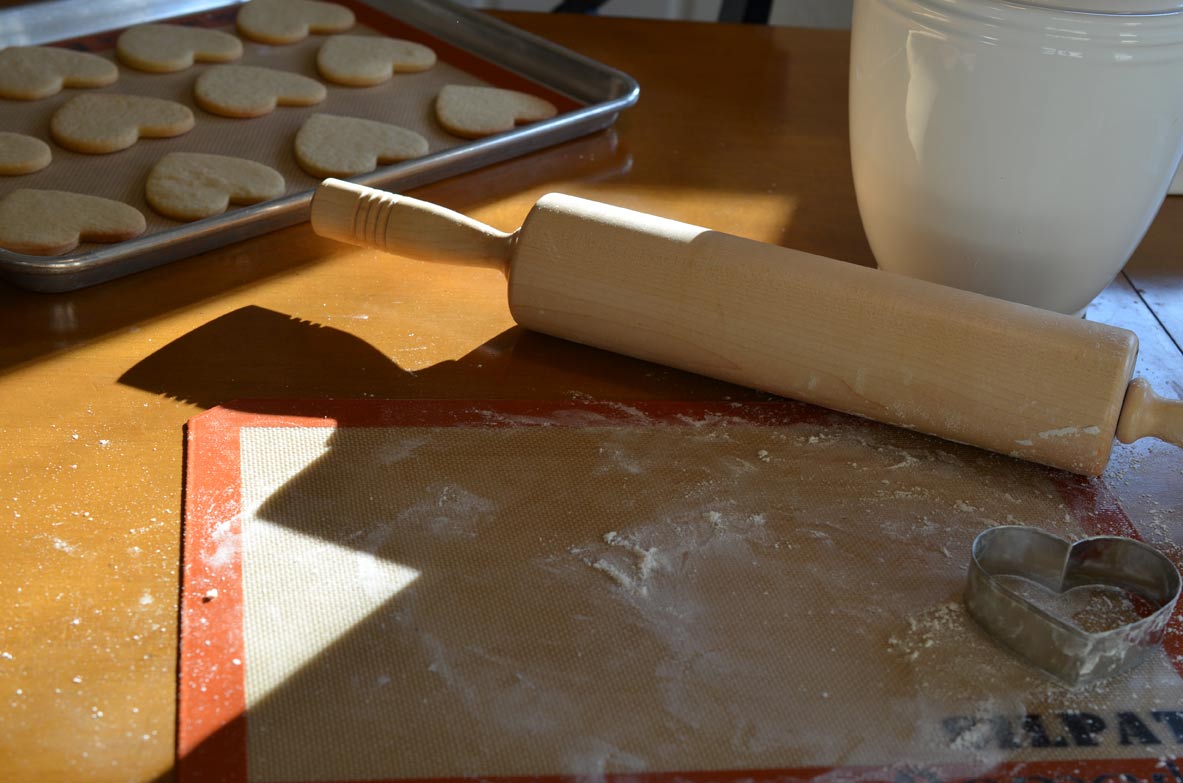
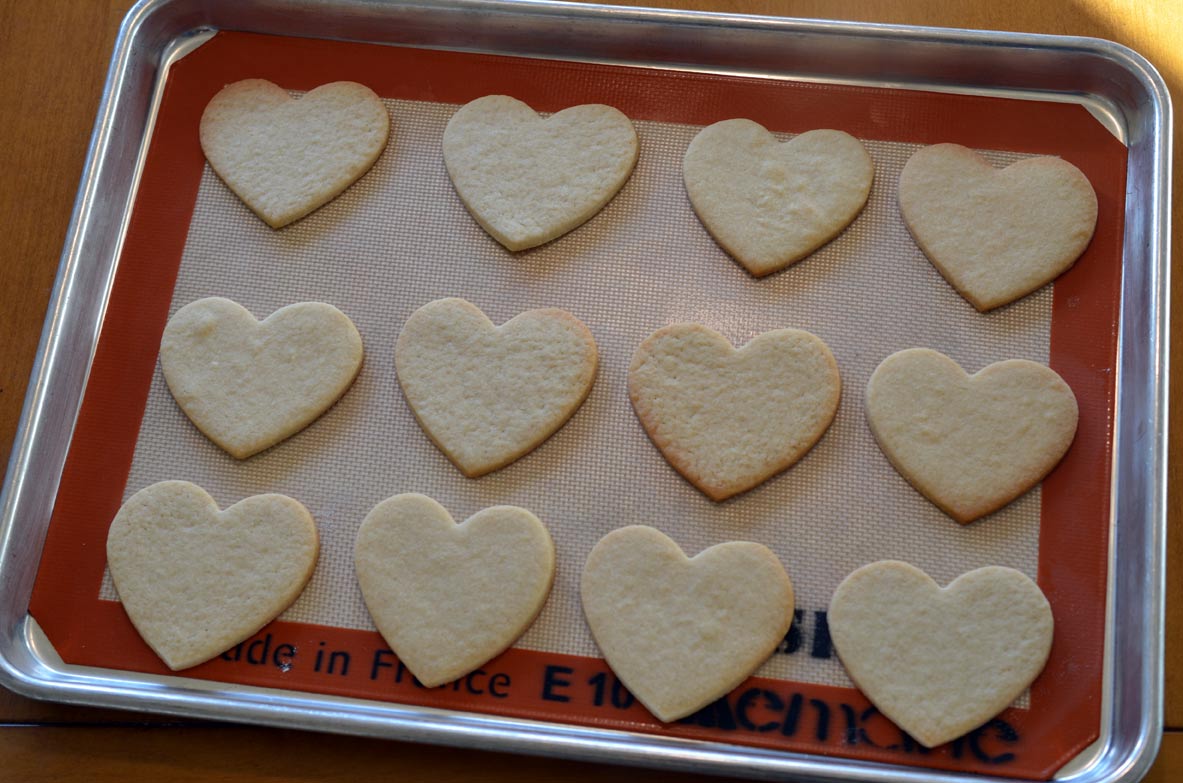
First you need to start with an excellent sugar cookie recipe. This one is my favorite; the dough is so irresistible that a lot of the cookies don’t even make it to the oven!
Once you’ve got your cookies baked and cooled, now it is time to decorate! This is the fun part! To decorate about 14 cookies you will need about 7 ounces of fondant. Use any colors you like. To get the pink color I used, use a 3 to 1 ratio of Wilton rose gel coloring and Americolor burgundy gel paste. For 7 ounces of fondant I used 3 drops burgundy and 9 toothpicks (half dipped) of the rose coloring. While I generally stick with Americolor gel paste, I prefer the Wilton rose color to the Americolor pinks. I sometimes end up with too much of a Pepto-Bismol pink with the Americolor and with the Wilton Rose you can achieve more of a raspberry.
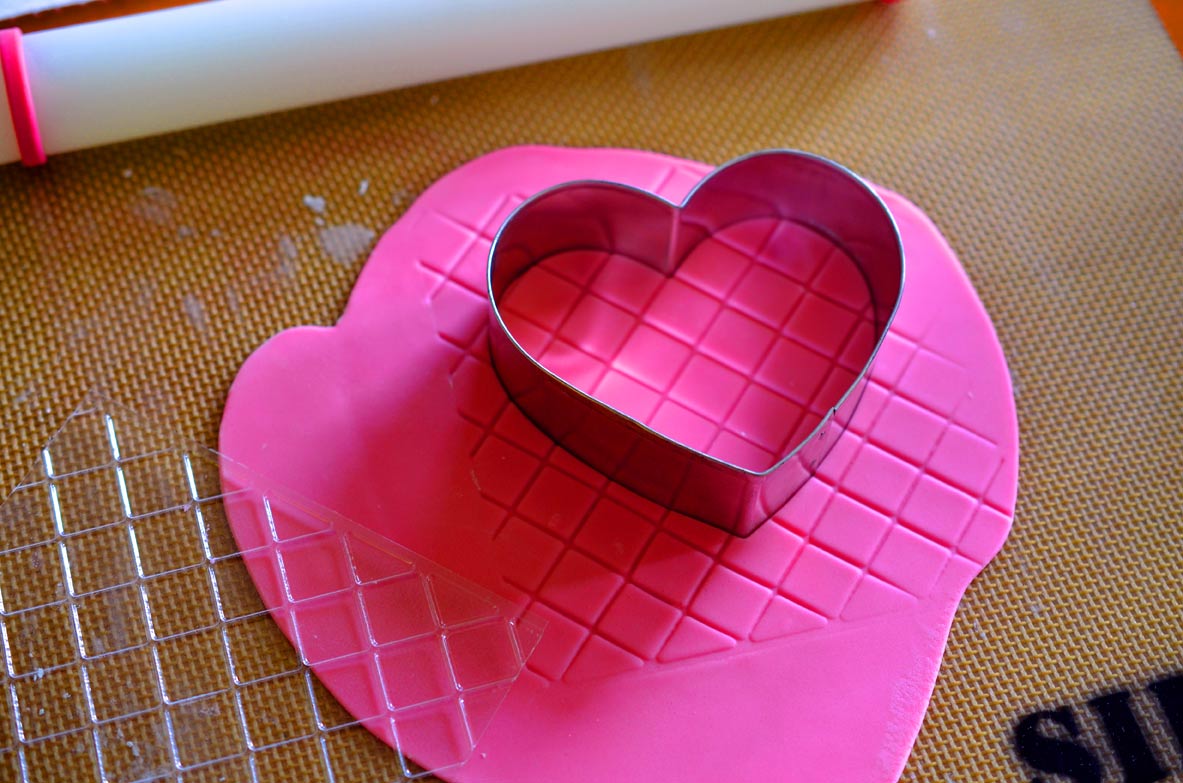
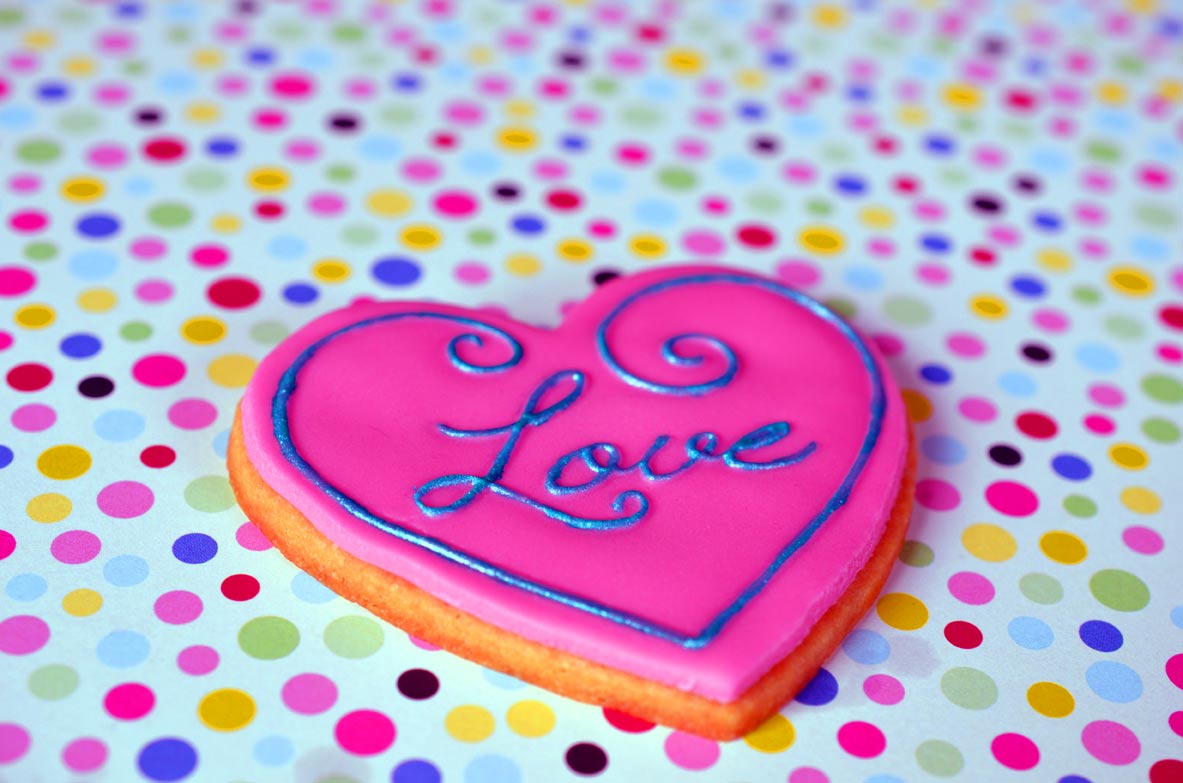
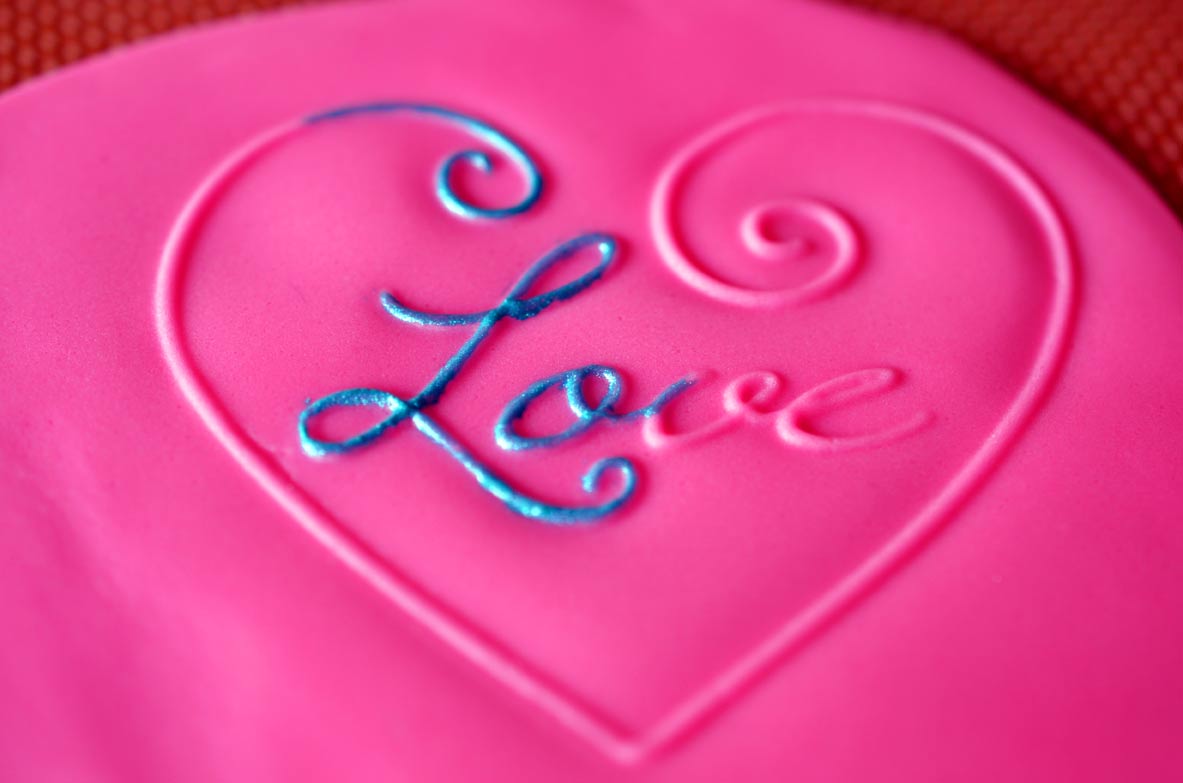
You want to roll your fondant to about 1/8″ thick. Spray your texture mats with non-stick spray and wipe away the excess. You can press the mat into the fondant using either side of the mat. One side will make a raised impression and the other will make an indented impression. I opted for the indented impression with the exception of the love mat. It only works one way or else the writing will end up backwards.
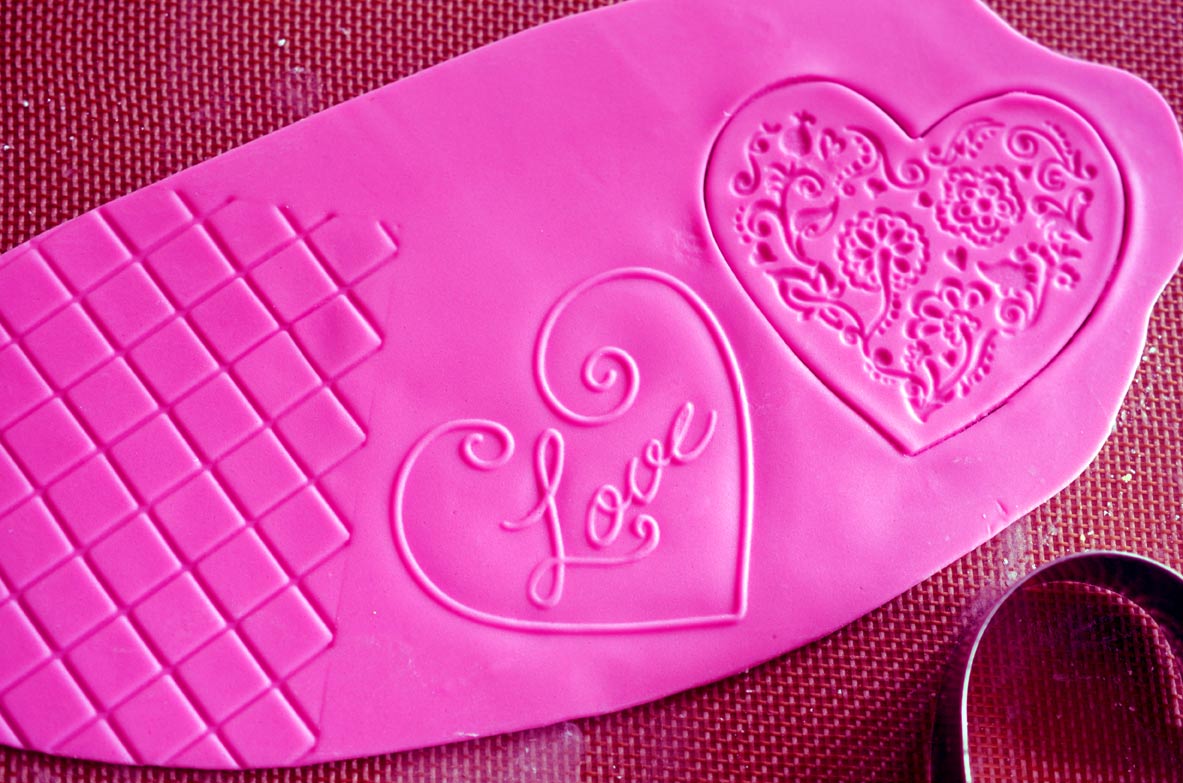
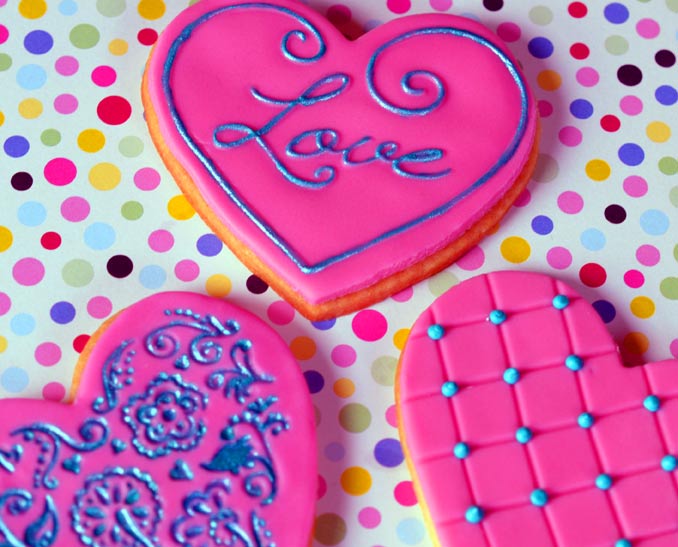
If you have trouble with the texture mat sticking to the fondant try to let the fondant set out a bit (5-10 minutes) after you roll it, or use a tiny bit of cornstarch on top of the fondant to make it less sticky. I think these look lovely just imprinted, but for extra oomph you can add some piped dots at the intersection of the lines on the quilted cookies, and some painted accents to the love and baroque heart cookies.
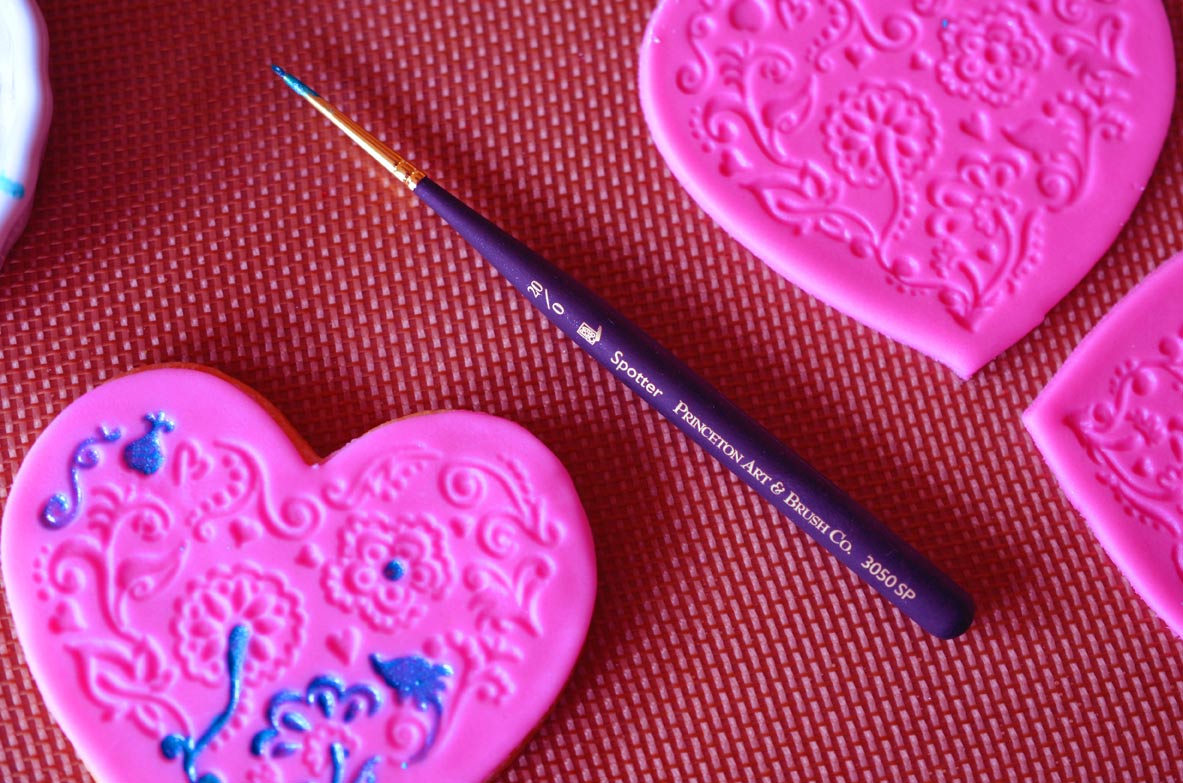
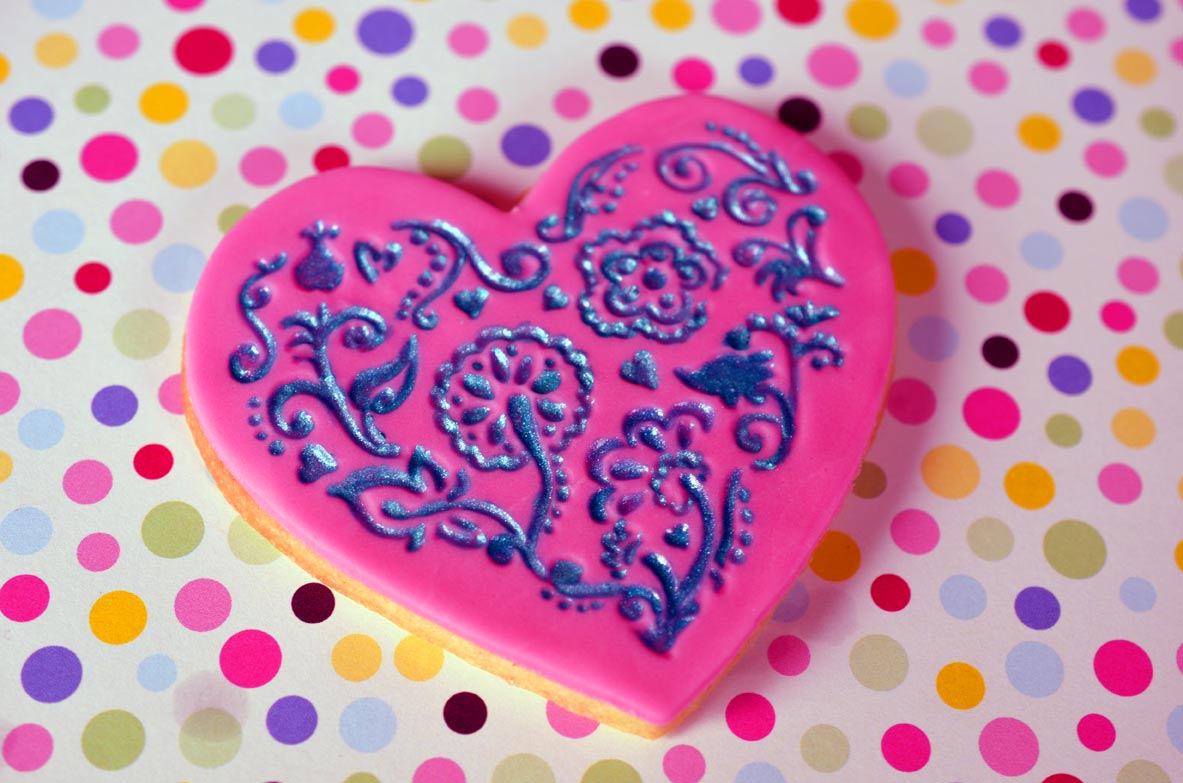
To paint the accents I use a mixture of Wilton White Pearl Dust, Vodka, Royal Icing, and gel paste (1 drop Americolor Sky Blue and 2 drops Americolor Teal). Just mix the gel paste, pearl dust, vodka, and royal icing until you get the consistency of paint. The royal icing is optional. I added it because I had made it already to pipe the dots on the quilted heart. It makes the “paint” a little bit thicker and more opaque. If you don’t use it, the paint will just be a bit more transparent. They key to painting the details is using a teeny tiny brush. I used the very smallest one I have.
To pipe the dots on the quilted cookie, I used a #2 tip, and added a 1:2 ratio of sky blue and aqua to get the turquoise colored royal icing. After you have piped the dots, look back to see if there are any pointy dots. If so, just press down gently with the tip of your finger to smooth the peak into a nice rounded dot. As long as your icing has not set too long, this should work. To attach the fondant hearts to the cookies, I used just a bit of thinned royal icing (since I already had it) spread over the cookie, and then just gently pressed down to get the fondant to adhere. You could also use piping gel if you have it on hand. I hope you have fun with this project. There are so many variations and possibilities! I would love to see your designs, so please post a picture if you give it a try!
- 3 cups flour
- 1-1/2 tsp baking powder
- 1 cup sugar
- 1 cup butter
- 1 egg
- 3 tbsp heavy cream
- 1 tsp vanilla
- Preheat oven to 400 degrees
- In a large bowl, sift together flour, baking powder, and sugar.
- Using a pastry blender cut in the butter until particles are fine and crumbly.
- In a small bowl, using a fork, beat the egg, heavy cream, and vanilla.
- Pour liquid ingredients into dry ingredients.
- Stir until dough comes together. Using your hands, combine and knead the dough into a uniform consistency.
- Roll out dough to about 1/4” thick on a floured surface or non-stick baking mat.
- Cut out shapes and place cookies on a parchment lined cookie sheet (or cookie sheet lined with a non-stick baking mat) and bake for 10-12 minutes until edges are just slightly brown.
- Cool for 5 minutes, and then transfer cookies to a cooling rack and enjoy or let cool completely and then decorate!