Sunny Yellow Gerber Daisy How-To
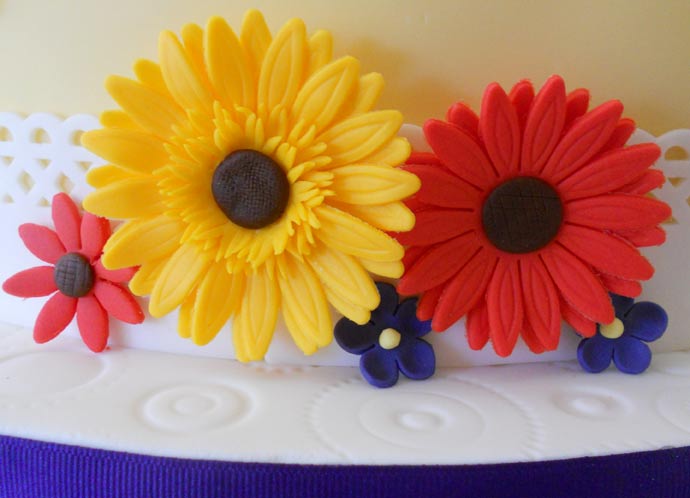
Edible flowers are wonderful decorations for cakes, cupcakes and more. I made these gum paste flowers for the bottom tier of a wedding cake, and I love the vibrant colors. Gum paste flowers are easy to create and make a big impression. Keep reading for a step-by-step on making the yellow Gerber Daisy in this photo. There are so many different techniques for making beautiful edible flowers, and I am excited to share my tips on making this simple and sweet yellow Gerber Daisy.
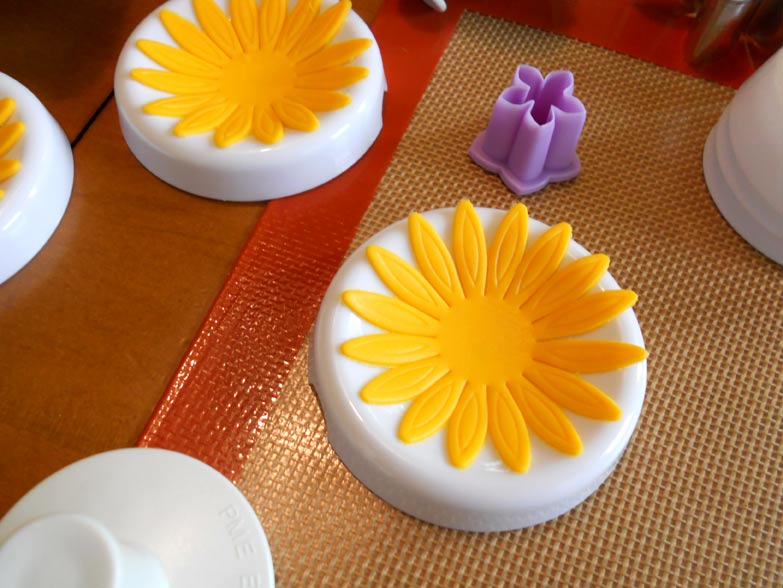
To make this sunny yellow Gerber Daisy, start with some bright yellow gum paste. I make my gum paste by simply adding Tylose powder (1.5 tsp per pound) to my fondant. I generally add the Tylose after I have mixed my color into the fondant, but you can add the Tylose to uncolored fondant and then color it as well. The color used to make this vibrant shade of yellow is AmeriColor Lemon Yellow. Once you have your gum paste colored, you need to roll it out to about 1/16″ and cut out the flower shape using the largest cutter from this daisy cutter set. I like to use my small fondant rolling pin with the pink bands for rolling out gum paste; it makes it easy to get that perfectly uniform thickness that you need when working with small detailed items like flowers. Once you have your flowers cut out, place them gently into your flower forming cups. These cups help your flowers to form into a natural cupped shape while drying. If you don’t have flower forming cups, not to worry, you can use a regular drinking glass. Just cover the top of the glass loosely with plastic wrap and then push down lightly to create a little hammock for your flower.
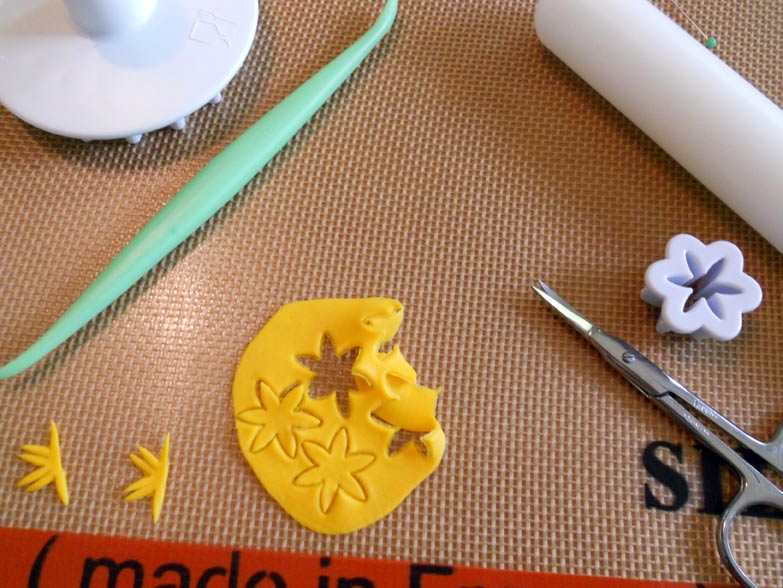
To make the small feathered petals that surround the center of the flower, use the smallest cutter from the Wilton fondant daisy shapes cut out set. Roll your gum paste as thin as possible to make these shapes. Cut the six-pointed flowers in half and then cut each point down the center to make two points.
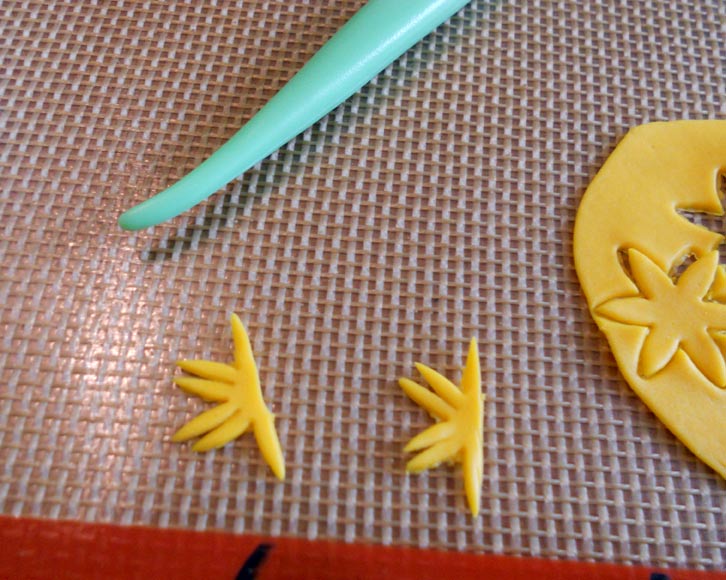
Push the outside points of the cut flowers inward so that the little petals are bunched together. For the base of the Gerber Daisy, stick two large daisy cut outs together, using a bit of water, so that the petals are staggered. Now you are ready to stick the feathered petal pieces to the rest of the flower.
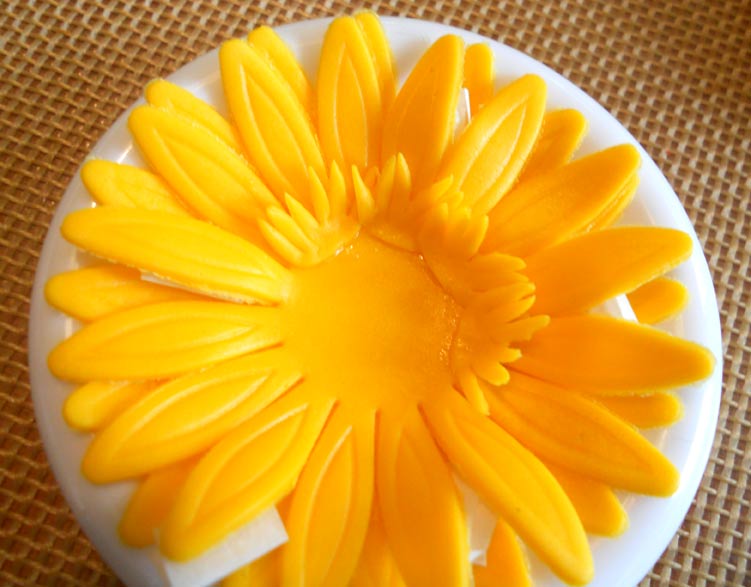
Use a tiny bit of water to stick the feathered petal pieces to the center of the flower. If necessary, use small pieces of parchment paper between the top and bottom daisy cut outs to keep the flower petals from sticking to each other while drying. The parchment can also help add dimension and texture to the flower. Stick a few pieces of parchment between the petals and remove them once the flower is dry.
Continue to work your way all around the center of the daisy until the tiny petals make a full circle.
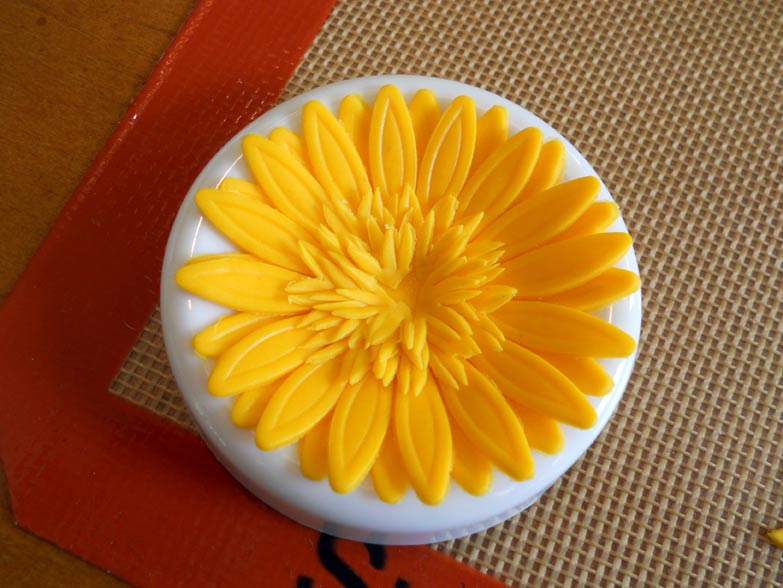
Continue adding more small feathered petals until you have several layers of texture. There are three full circles of feathered petals on this flower.
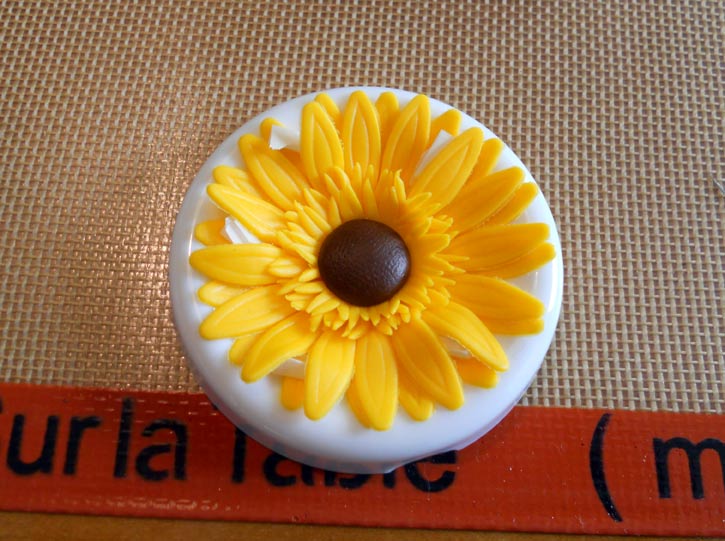
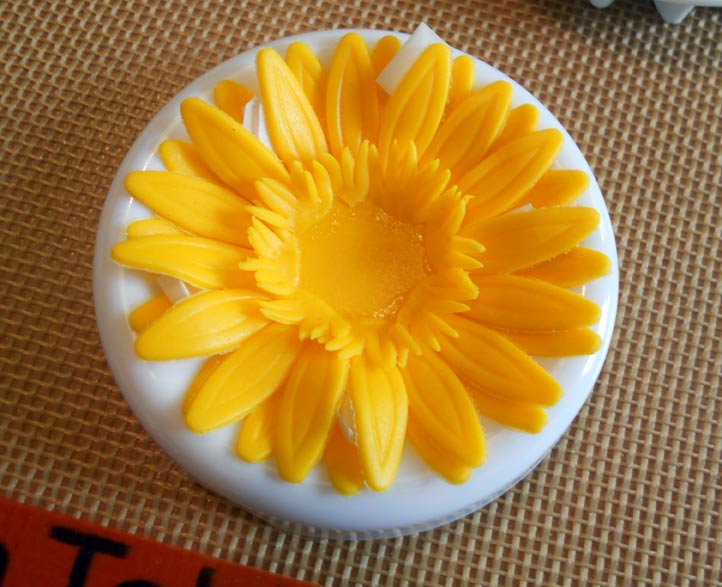
For the center, roll a small ball of dark brown gum paste and flatten the ball into a small circle. To get the texture shown on the center of this flower, press the gum paste circle against the bottom of a medium sieve. The harder you press, the more pronounced the texture will be. Luckily if you overdo it, you can just re-roll the ball and try again. Attach the center using a dab of water, and your sunny yellow Gerber Daisy is complete! Experiment with different color combinations and designs. The fun thing about edible flowers is that there are no rules! You can make them look as realistic or whimsical as you like, so just have fun!