Ducky Suckers
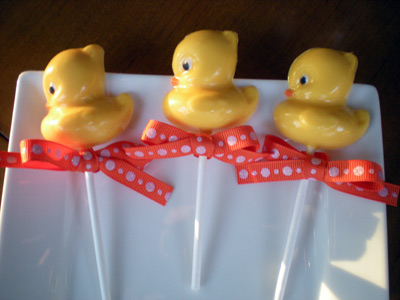
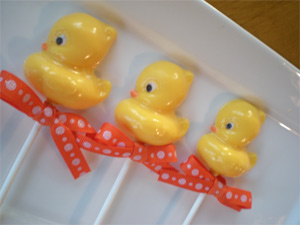
These Ducky Suckers are adorable favors for a baby shower, Easter party or other celebration. They can also be used to construct our Ducky Cupcake Tree.
To make the ducky suckers you will need the following –
~Ducky Mold (if you are making a large quantity I recommend you use at least two molds. The more molds, the faster the process will go.)
~4 bags yellow candy melts (this will make about 40 duckies – 1 bag makes approximately 10 duckies)
~2 white melts for the eyes
~2 black melts for the eyes
~2 orange melts for the beaks
~40 four and a half inch lollipop sticks
Tools needed for this project are as follows –
~12oz or 6oz squeeze bottle
~Very fine tipped paint brush
~Candymelter palette (optional)
~Electric Skillet (optional)
~Toothpicks
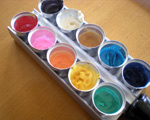
While the candymelter palette and electric skillet are optional I highly recommend these tools especially if you plan on doing other chocolate projects. If you can get just one, get the candymelter palette first and the electric skillet second. The candymelter palette is one of those tools that once you get you will never be able to live without. It has made my candy projects so much easier! You plug the palette in, drop in one or two candy melts/wafers in each of the tiny aluminum cups and it melts them and then keeps them warm while you work. When I first started trying to do chocolate projects I would get all of the different colors I wanted to use melted and then just as I would begin to work I would realize that the first color I melted had already set up. This is so frustrating. The candymelter palette solves this problem and makes colorful candy projects much easier.
The electric skillet is also very useful and you may even have one of these at home already. You can use it to keep small cups of melted candy warm. I put mine on the lowest setting, put a couple of terrycloth dishtowels directly onto the skillet and then place my candy filled squeeze bottles on top of the towels. This keeps the chocolate warm so you don’t have to reheat it while you’re working.
Now that you have everything you need, it’s time to begin making the duckies.
Step 1 – Put the white candy melts, black candy melts and orange candy melts in individual cups of the candymelter palette and plug in. If not using the candymelter palette, melt these in small cups and keep warm in electric skillet or re-warm as needed.
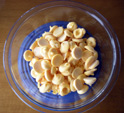
Step 2 – Melt 1 bag of yellow candy melts. I do this in the microwave. I put the candy melts in a microwave safe bowl and melt on defrost setting in 30 second increments stirring each time. You want the melts to melt evenly and not get too hot or they may seize up and become difficult to work with.
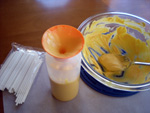
Once the candy is melted, I use a funnel to get the candy into my squeeze bottle. Some people prefer to melt the candy directly in the squeeze bottle. This is an option that I have tried but I find that it can be difficult to get all of the candy completely melted and if it is not fully melted, candy globs will plug the tip of the squeeze bottle.
You should have leftover candy in the bowl. I place this in the electric skillet to keep it warm until I need to refill my squeeze bottle.
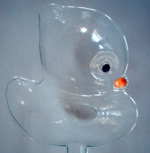
Step 3 – Use a very fine tipped paint brush to paint the ducky eyes. Begin by putting a small dab of black on the eye of the mold to serve as the pupil. Do this for all of the eyes on the mold. If you are using more than one mold, complete the pupils for all of the eyes on all of the molds before moving on.
Step 4 – Use a very fine tipped paint brush to paint the ducky beaks. If you have just one paint brush use a dry paper towel or cloth to wipe the bristles before changing to another color. Do not use water to wash the brush. Bringing water in contact with the candy melts will cause them to seize and become unworkable. Use the orange candy melts to paint the beaks. I try to get a droplet of orange candy and place it on the beak so that the beak is solid and not see through. You can also achieve this by doing multiple coats.
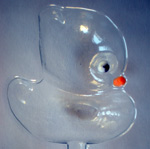
Step 5 – Make sure that the black has set up before painting the white over it to complete the eye. If you are using just one mold, you probably need to wait a few minutes. If you are using more than one you can probably proceed because by the time you are finished the first mold is probably dry. To test, just touch the black and if it is still liquid it is not set up enough.
Once the black is set, paint the white directly over the black and all around to form the iris. You will want to put a significant amount of white candy on the eye so that it will not be see through.
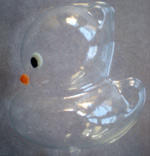
Step 6 – Make sure that the eye is fully set as described in step 5. This will take about 5 minutes at room temperature. Now you can go ahead and fill in the rest of the mold with yellow candy melts. Use the squeeze bottle to fill each ducky cavity. Fill all of cavities in the mold. Keeping the mold level, tap the mold on the counter to fill in the cavities and to get the air bubbles to rise to the top. Note: Do not tap excessively as this may cause the colors to bleed together. You can hold the mold over your head to check and see if this is happening.
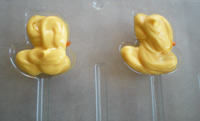
Now insert the lollipop sticks. Poke the lollipop stick into the candy surface and then rotate to get it fully embedded. If necessary you can cover the lollipop stick with some additional candy using the squeeze bottle.
If you are using multiple molds, follow the above process for one mold at a time. If you fill the cavities in all of the molds the candy may have set up a bit before you come back to tap and insert the lollipop sticks.
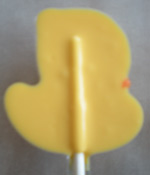
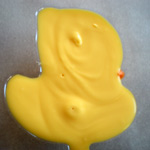
Step 7 – Place the mold in your refrigerator until set. In my refrigerator this takes about ten minutes. The molds can also be set a room temperature on a cool day, but this will take a lot longer.
Step 8 – Release the duckies. If the duckies do not release easily and part of the eye or candy is left behind, the mold has not set long enough and you need to refrigerate it for a longer period of time.
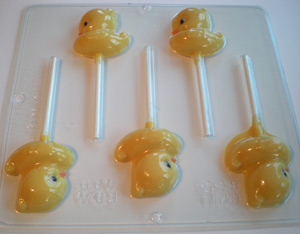
Step 9 – Enjoy! The chocolate ducky suckers will keep for a very long time (I have kept some for months). A benefit of making things with chocolate and candy melts is that they are stable and almost non-perishable. If you are using the duckies for the Ducky Cupcake Tree you will need to cut about an inch to an inch and a half off of the bottom of each lollipop stick so that they will be the right height for sticking in cupcakes. If you are making the ducky lollipop favors you will need 3”x4” Clear Treat Bags and approximately 12” of ribbon per lollipop to tie in a bow.
