First Communion Cake
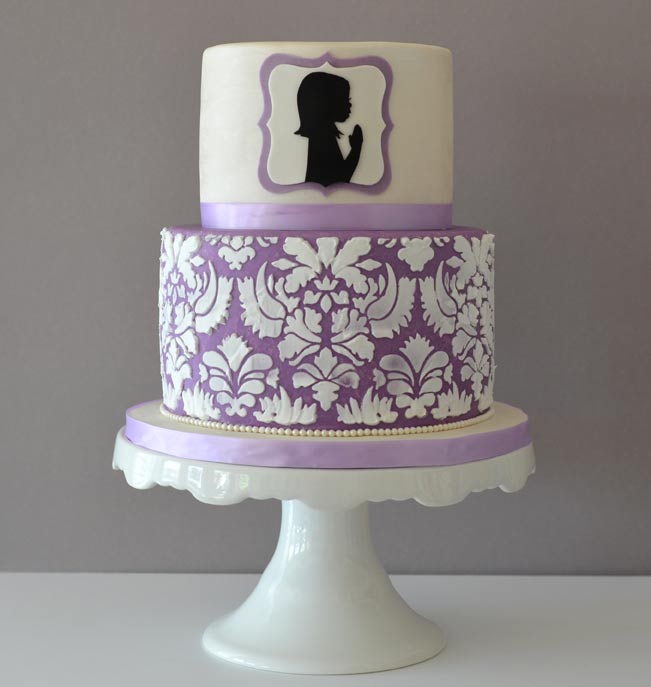
This is a cake that I made just last week for my goddaughter’s First Communion! First Communion is a pretty big deal, and I have never made a religious cake before, so I was a little bit stumped on the design. My goddaughter, Kylie, is such a wonderful, talented, beautiful little girl and I needed to make something extra special for her big day! Luckily Kylie let me know that she wanted the cake color scheme to be purple, pearl, and black! Gotta love a girl who knows what she wants! Such a sophisticated choice as well!
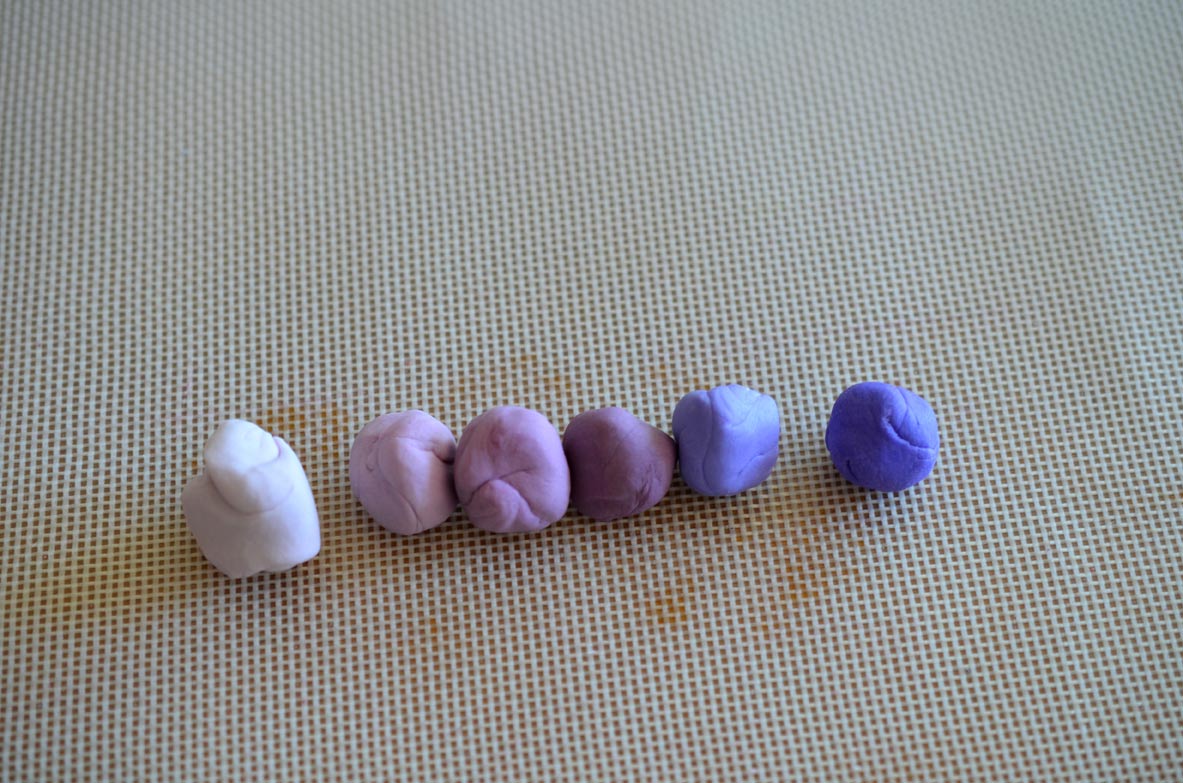
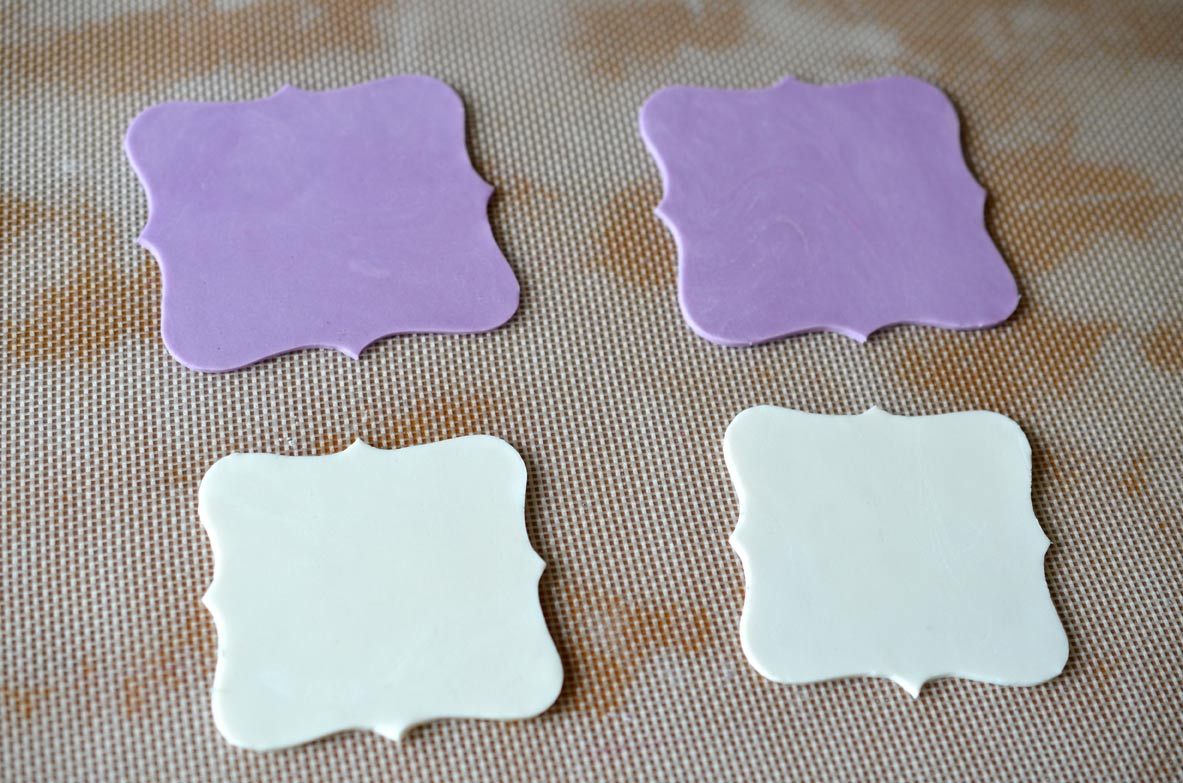
It all started with the purple fondant. I really wanted a beautiful shade of lavender, but once I started the coloring process, I got more than I bargained for. I just could not get the shade that I wanted with my “go to” Americolor gel pastes. I tried both Americolor Royal Purple and Americolor Violet, but the violet was too blue, and with the royal purple I kept ending up with muted dull mauve colors that just looked dingy. I started adding Americolor Fushia to the mix and ended up with a slightly better shade, but it was still not ideal. I decided to try a completely different brand of coloring, Wilton neon purple. I’m not sure if you can buy this color individually; I had it as part of a Wilton neon colors set, so I thought I should give it a try. To my delight, the Wilton neon purple created a perfectly pretty shade of purple. The first four colors (starting on the left) in the photo above were created with Americolor Royal Purple and Americolor Fushia gel pastes combined. The two colors on the far right are colored with Wilton neon purple.


One more thing about purple…it fades like crazy! After coloring my fondant I wrapped it in plastic wrap and let it rest overnight. When I woke up the next morning, my beautiful shade of lavender had changed to cornflower blue. Argh! In the face of this disaster I went online to see what other people were saying. I found that this was a common problem that some said could be fixed with baking soda, if you add it before the fade occurs. I couldn’t save the original batch, so I started fresh with some new fondant and added 1/4 tsp baking soda per 4 ounces fondant. I couldn’t find any exact recommendations on the quantity, so this was a test. I again let this set overnight, and I woke up to fondant that was still lavender, but seemed to have darkened a bit more than normal. I determined that although the color was darker than I had planned on, it would work. During this process I got to thinking back on other purple cakes that I have made. I realized that my purple gumpaste has never faded. I don’t know why this is, but it seems that when you add tylose to fondant (this is how I make my gumpaste) it protects it from fading.
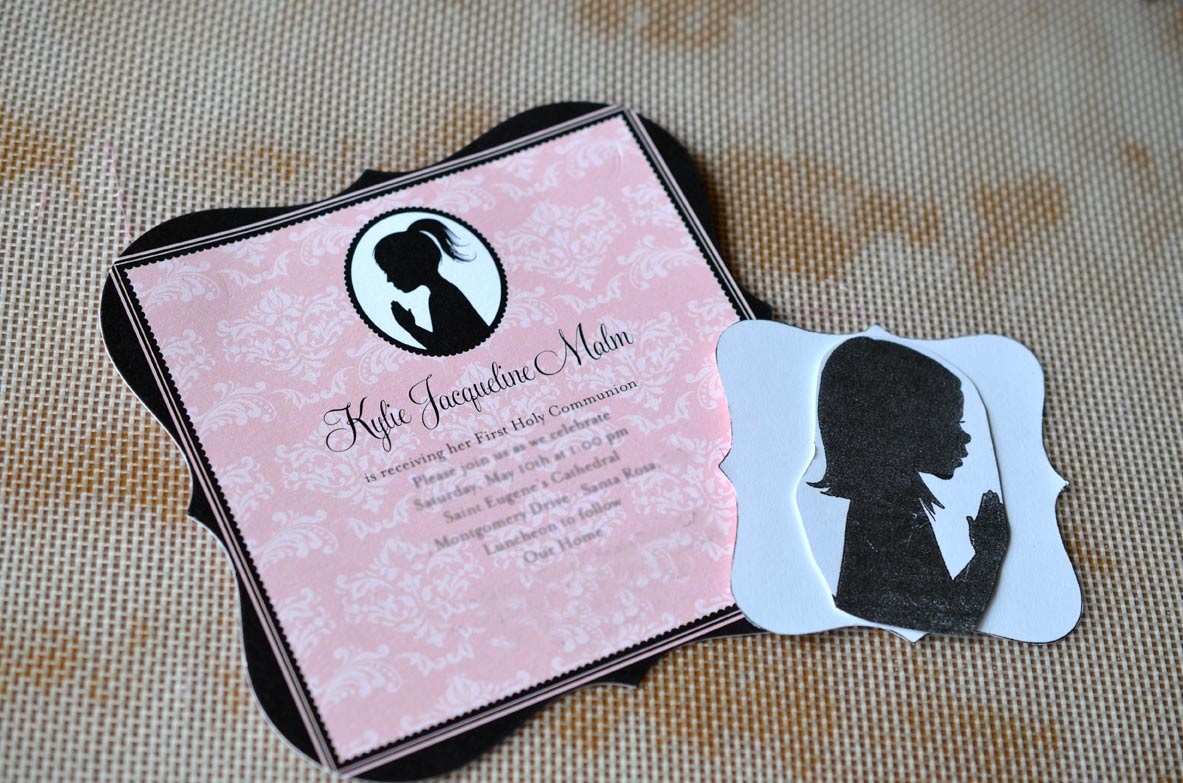
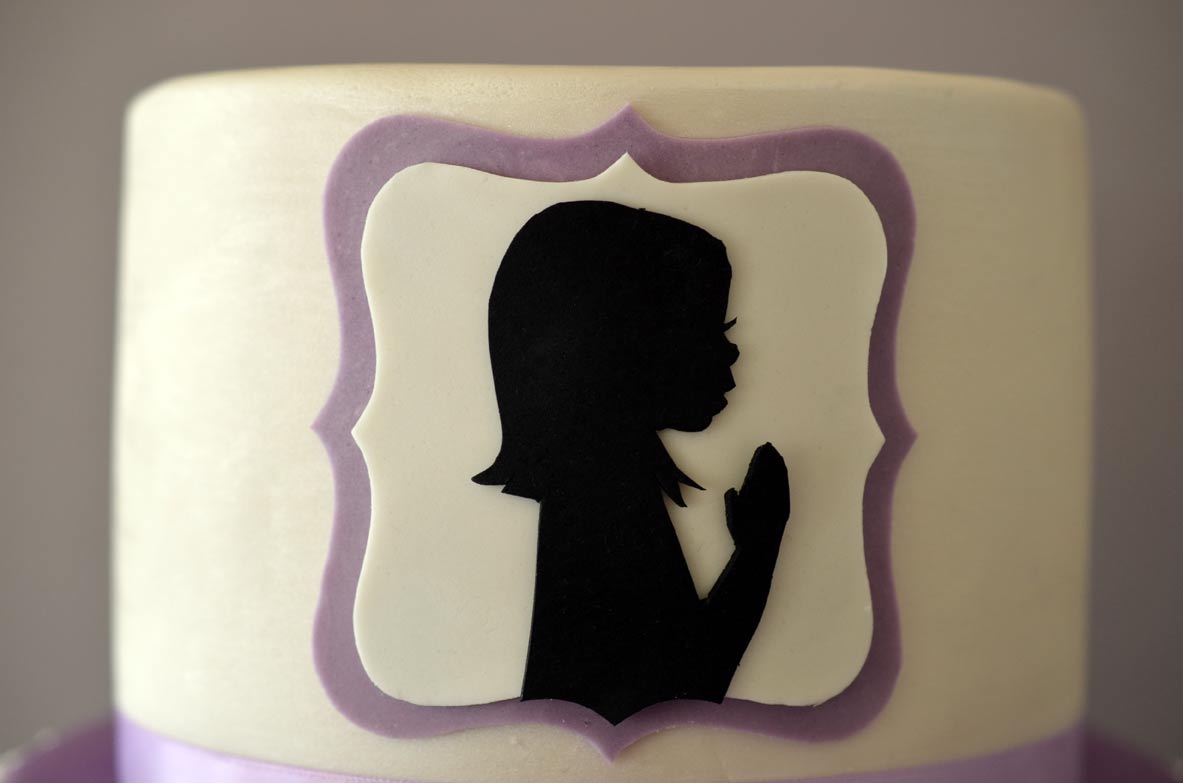
Once I past the first hurdle, it was time to work on design. I took a cue from the invite and used a silhouette portrait of Kylie to make a personalized child praying silhouette. I used an x-acto knife to cut through the paper template and etch the silhouette outline into black gumpaste.
The shape of the invite lent itself to being the frame for the silhouette. The frames and silhouette are cut from rolled gumpaste using an x-acto knife with a new blade.
The background of the invite gave me the idea for stenciling the bottom tier of the cake. I found a damask cake stencil that I could stencil onto the cake with royal icing.
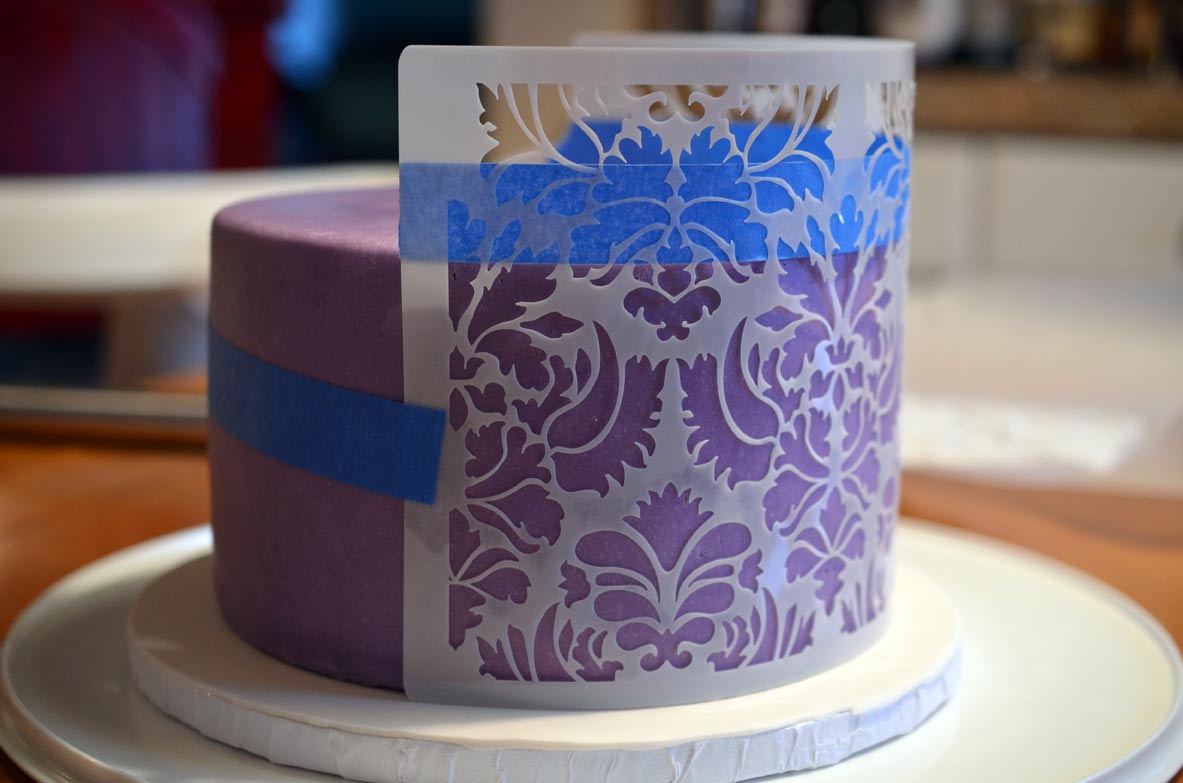
This was my first time working with a cake stencil, and it turned out that my cake was shorter than the stencil. I could have cut the stencil to the right height, but the stencil was expensive, and I still wanted to be able to use it on a taller cake. I masked off the portion that I didn’t need with masking tape so that the top edge would be clean.
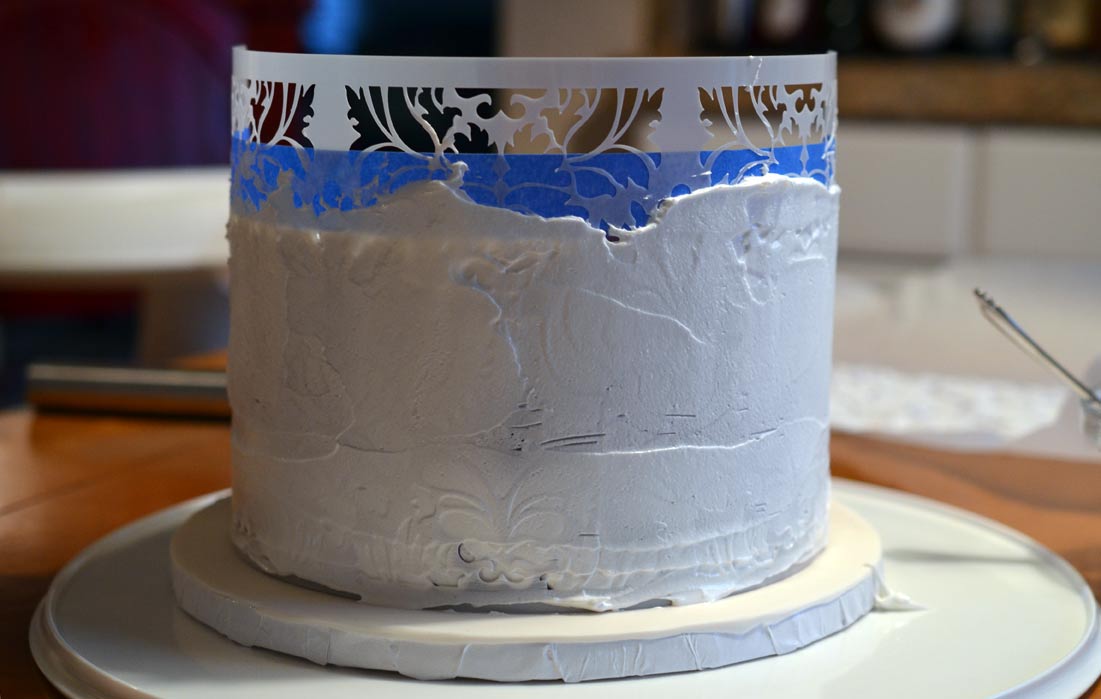
I made one batch of royal icing and thinned it slightly with water to use as my stenciling medium. I spread it onto the stencil with an offset spatula, and then removed the stencil. The stencil worked alright, but I found that stenciling on a round cake is much more difficult than stenciling on a square or rectangular cake. The stencil needs to have direct contact with the cake to make the stenciling come out crisp, clean, and uniform thickness. On a round cake, your sides need to be perfectly square all the way around so that there are no gaps between the cake and the stencil. My cake had relatively square sides, but there were some varying gaps, and as a result the stenciling was not a uniform thickness all the way around and there was some blurring. One length of the stencil was not enough to go around the cake completely, so I waited 15-20 minutes for the royal icing to dry and then applied the stencil to the remaining area of the cake. I overlapped the stencil so that the pattern would line up seamlessly. On a round cake, I can’t see a way around having a seam. The place where the stenciling finally meets up will just be the back of the cake. Again, on a square or rectangular cake, you won’t have this problem.
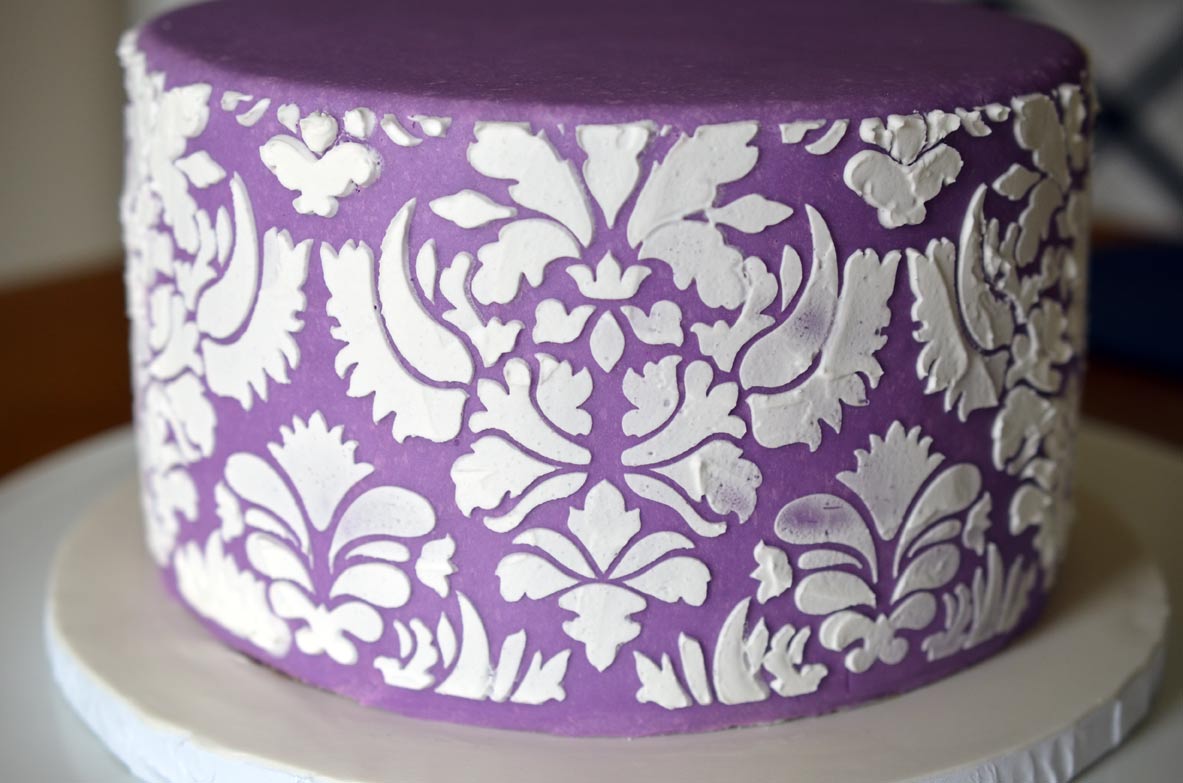
You can see the uneven thickness of the royal icing in this photo as well as some of the blurring. Even though this is an imperfection, it gives it texture, and adds some old-world charm to the cake. It feels like it could be part of a beautiful old cathedral.
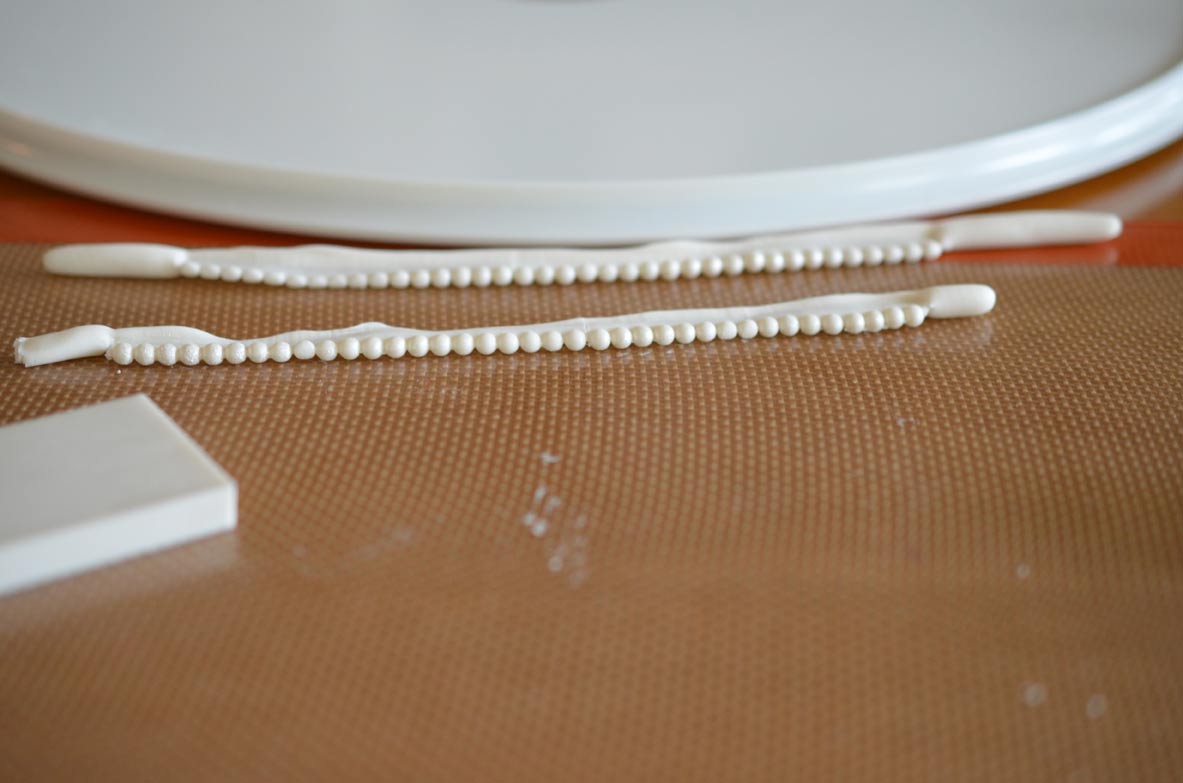
I still needed to incorporate pearl into the cake, and the thought that gumpaste pearls would be lovely for the bottom border. I use a 4mm pearl mold to make the strands of pearls. The key to making pearls is to brush your pearl mold liberally with pearl luster dust. I used CK Products Super Pearl Luster Dust here. I make all of the pearls and then trim off the excess with an x-acto knife before applying them to the cake.
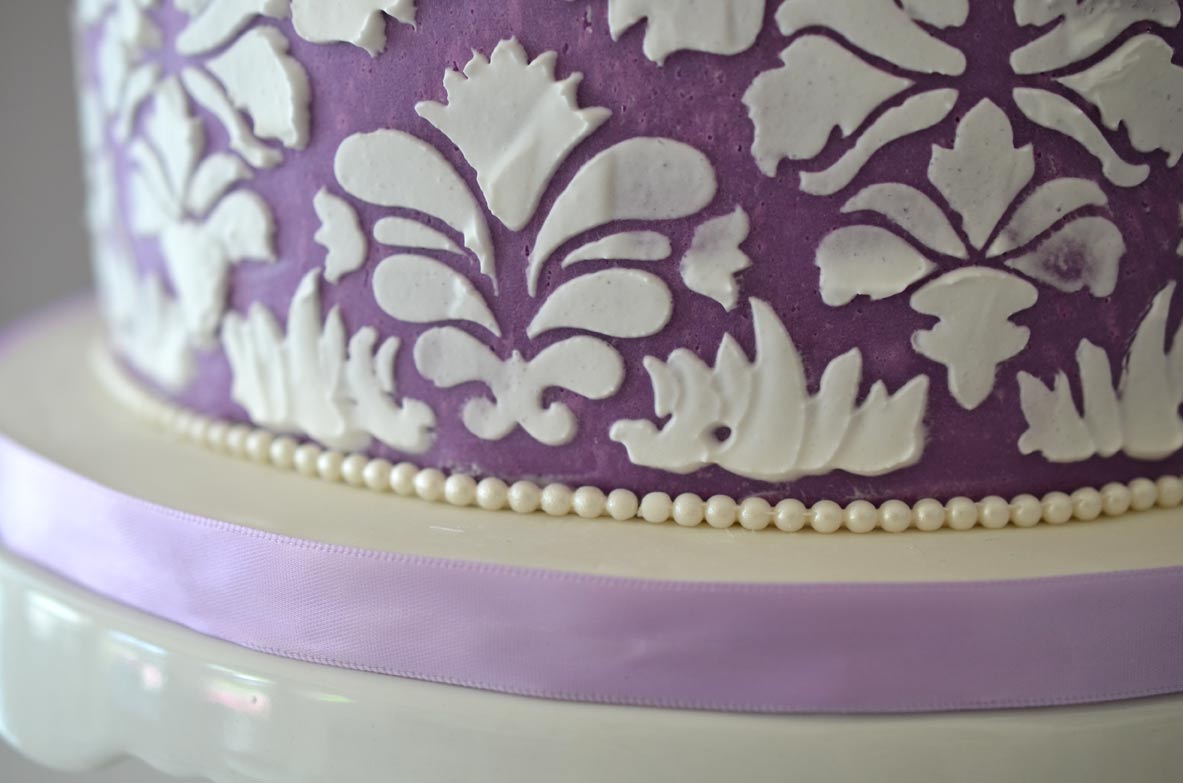
The pearls make a very elegant touch, and they are deceivingly simple to make. I wrapped the cake drum in a lavender satin ribbon. I am so fortunate to have such an amazing goddaughter, and it was such a pleasure making her First Communion cake!