Skateboarding Dragon Cake

Make this daring dragon cake for your skateboarding daredevils. The colors can be tailored to their favorites, and a message can be added to the fondant skateboard. This dragon cake is inspired by the dragon cake in Debbie Brown’s 50 Easy Party Cakes.

Take a 12″ cake drum and place a dollop of buttercream in the center (spread with angled spatula) and then cover with colored rolled fondant. I prefer Massa fondant from Switerland, It comes in a big tub, but homemade, Wilton, or Duff’s Charm City Fondant will work just fine too.

After the drum is covered, take a sharp knife and trim the excess fondant. Next, neatly shape the edge with your fingers or a fondant smoother.

I ended up baking two cake halves in pyrex bowls because I need a larger cake to feed 24 kids. For a slightly smaller cake use our 6″ ball pan.

Next, cool the two halves overnight and then level them with a cake leveler as needed.

Pipe an icing dam around the edge of the bottom half and add a filling of your choice. Place the second cake half on top and press down to make sure it is settled. Now crumb coat with buttercream icing using a spatula.

Make sure to mold the head at least 2 days ahead of time. While drying set on parchment or a silpat and support with tissue papper. Attached the ears by applying a tiny bit of water with a decorator’s brush.

Sculpt the tail and neck piece 2 days ahead of time also. As the fondant sets up add the nostril holes with the opposite end of the decorator’s brush.

Add a spot of royal or buttercream icing to the fondant covered cake drum before placing the cake.

Place the cake as shown and add the neck piece and tail.

Take a string and measure the circumference of your dragon cake. Roll out a fondant circle that has a diameter equal to the measurement you just took. Roll out (with cornstarch) so that it is 1/4 in thick.

Roll the fondant onto your 21 in rolling pin and then drape over the cake supporting the fondant as you cover it.

Form the body around the cake using fondant smoothers and your fingers.

Cut the mouth into the dried head with a sharp knife and add the eyes (colored fondant).

Now add a skateboard or other prop. This was made of fondant (colored with gel paste, like all my fondant) and dried for 2 days. I thought about piping happy birthday on it, but ran out of time.
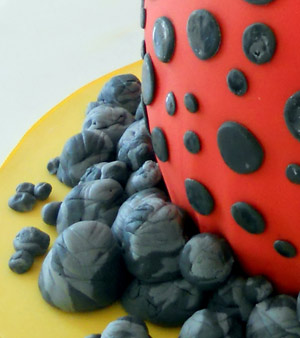
I had my husband sculpt all these fondant rocks. He came up with a method of twisting two colors of fondant together, forming a ball, and then tapping them with a butter knife and crumpled tin foil.
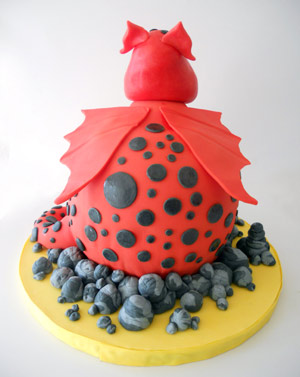
The last thing to do is add the wings. Again, make these ahead of time so they can dry thoroughly. Attach the wings with a little water.
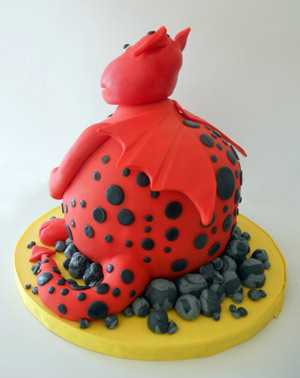
Here is the back view of the finished cake.

A Skateboarding Dragon Cake Just in Time for Shelby’s 10th Birthday Party!
